Tuesday, September 21, 2010

Peasant Pot Bread- No Knead Bread

This is a recipe from one of my most favorite foodie blogs, A Chow Life. She has the best bread recipes and the photography by her husband, Kirk Mastin, is incredible! I'll share her recipe with you but make sure to take a look through her blog and make some of her other delicious recipes!

Ingredients

4 cups (20 ounces) unbleached all-purpose white flour or white bread flour, plus more as needed


1 teaspoon granulated sugar

2 teaspoons table salt

3/4 teaspoon instant, fast-rising or bread-machine yeast

2 cups ice water, plus more if needed

Corn oil, canola oil or other flavorless vegetable oil or oil spray for coating dough
 
Directions
 
First Rise: In a large bowl, thoroughly stir together the flour, sugar, salt and yeast. Vigorously stir the water into the bowl, scraping down the sides and mixing until the ingredients are thoroughly blended. If the mixture is too dry to incorporate all the flour, stir in more water, a bit at a time, just enough to blend the ingredients. Don’t over-moisten; the dough should be very stiff. If necessary, stir in enough more flour to yield a hard-to-stir dough. Brush or spray the top with oil. Cover the bowl with plastic wrap. If desired, for best flavor or for convenience, you can refrigerate the dough for three to 10 hours. Then let rise at cool room temperature for 18 to 24 hours. If convenient, vigorously stir the dough once about halfway through the rise.


Second Rise: Using an oiled rubber spatula, gently lift and fold the dough in toward the center, all the way around, until mostly deflated; don’t stir. Brush or spray the surface with oil. Re-cover the bowl with plastic wrap that has been coated with nonstick spray. Let rise using any of these methods: for a 1 1/2- to 2 1/2-hour regular rise, let stand at warm room temperature; for a 1- to 2-hour accelerated rise, let stand in a turned-off microwave along with 1 cup of boiling-hot water; or for an extended rise, refrigerate, covered, for 4 to 24 hours, then set out at room temperature. Continue the rise until the dough doubles from the deflated size; remove the plastic if the dough nears it.


Baking Preliminaries: 20 minutes before baking time, put a rack in the lower third of the oven; preheat to 450 degrees. Heat a 3 1/2- to 4-quart (or larger) heavy metal pot or Dutch oven in the oven until sizzling hot (test with a few drops of water), then remove it, using heavy mitts. Taking care not to deflate the dough (or burn yourself), loosen it from the bowl sides with an oiled rubber spatula and gently invert it into the pot. Don’t worry if it’s lopsided and ragged-looking; it will even out during baking. Generously spritz or brush the top with water. Immediately top with the lid. Shake the pot back and forth to center the dough.


Baking: Bake on the lower rack for 55 minutes. Remove the lid. Reduce the heat to 425 degrees. Bake for 15 to 20 minutes longer, or until the top is well browned and a skewer inserted in the thickest part comes out with just a few crumbs on the tip (or until center registers 209 to 212 degrees on an instant-read thermometer). When it seems done, bake 5 minutes longer to ensure the center is baked through. Cool in the pan on a wire rack for 10 to 15 minutes. Remove the loaf to the rack and cool thoroughly.


Serving And Storing: Cut or tear the loaf into portions; it tastes good warm but will cut much better when cool. Cool completely before storing. To maintain the crisp crust, store draped with a clean tea towel or in a heavy paper bag. Or store airtight in a plastic bag or wrapped in foil: The crust will soften, but can be crisped by heating the loaf, uncovered, in a 400 degree oven for a few minutes. The bread will keep at room temperature for three days, and may be frozen, airtight, for up to two months.

Monday, September 20, 2010

Banana Zucchini Bread

Banana Bread is one of our family's favorites from Nana's recipes! We make it all the time! It's a great way to use up the bananas that are too brown to eat. Right now I have an abundance of zucchini in my garden so I added some into this bread. I found that the zucchini makes the bread even more moist than before!


Ingredients

1 1/4 cup Sugar
1/2 cup Butter, room temperature
2 Eggs
1 tsp Baking Soda
3 TBS Milk
1 TBS Vinegar
1/4 tsp Salt
1 1/2 cup Flour
1 tsp Vanilla
1 cup (2) mashed Bananas
1 cup shredded Zucchini


Directions

Preheat Oven to 375 and grease a bread pan. Set aside.

Cream together the butter, sugar, and eggs in electric mixer.

In a glass measuring cup or tall glass add 1 tsp Baking Soda. Add 3 TBS Milk to dissolve the Baking Soda. Then add 1 TBS Vinegar. Stir gently and prepare for the mixture to foam vigorously to the top of the glass. Add immediately to the butter & sugar mixture and stir.


Sift together Flour  and Salt. Add slowly to wet ingredients. Mix well.

Mash Banana with a fork and add to mixture. Add Shredded Zucchini. Add Vanilla. Blend one more time for about 30 seconds.


Pour mixture into bread pan and bake for 45-50 minutes (or longer if center is not firm).

Enjoy!


Saturday, September 18, 2010

French Onion Soup with Gruyere Croutons

We had lunch with some friends, Buck & Amy Pennington, the other day and they sent us home with a beautiful slice of Gruyere cheese! I thought it would be perfect melted to perfection atop a crusty crouton of homemade peasant bread dipped into a steaming pot of French Onion Soup. I had only made French Onion soup once before and it was a "quick" recipe. The end result was too tangy and sour for my taste.  As it bubbled away, we made plans for our upcoming La Lune events.
Here is the recipe straight from Cook's Illustrated. We followed it to a "T" and it turned out with a wonderfully deep, rich flavor! Totally worth the time it took to dig up onions from the garden, clean them, chop them to pieces as we wiped away our onion tears! It's even better after it sits for a day or two. The flavor deepens even more!

Note: You must have a dutch oven to make this recipe or an oven safe pot.


Ingredients
Soup

3 tablespoons unsalted butter , cut into 3 pieces
6 large yellow onions (about 4 pounds), halved and cut pole to pole into 1/4-inch-thick slices
(see illustration below)
Table salt
2 cups water , plus extra for deglazing
1/2 cup dry sherry
4 cups low-sodium chicken broth (see note)
2 cups beef broth (see note)
6 sprigs fresh thyme , tied with kitchen twine
1 bay leaf
Ground black pepper

Cheese Croutons


1 small baguette , cut into 1/2-inch slices
8 ounces shredded Gruyère cheese (about 2 1/2 cups)

Instructions


1. 1. For the soup: Adjust oven rack to lower-middle position and heat oven to 400 degrees. Generously spray inside of heavy-bottomed large (at least 7-quart) Dutch oven with nonstick cooking spray. Place butter in pot and add onions and 1 teaspoon salt. Cook, covered, 1 hour (onions will be moist and slightly reduced in volume). Remove pot from oven and stir onions, scraping bottom and sides of pot. Return pot to oven with lid slightly ajar and continue to cook until onions are very soft and golden brown, 1 1/2 to 1 3/4 hours longer, stirring onions and scraping bottom and sides of pot after 1 hour.


2. 2. Carefully remove pot from oven and place over medium-high heat. Using oven mitts to handle pot, cook onions, stirring frequently and scraping bottom and sides of pot, until liquid evaporates and onions brown, 15 to 20 minutes, reducing heat to medium if onions are browning too quickly. Continue to cook, stirring frequently, until pot bottom is coated with dark crust, 6 to 8 minutes, adjusting heat as necessary. (Scrape any fond that collects on spoon back into onions.) Stir in 1/4 cup water, scraping pot bottom to loosen crust, and cook until water evaporates and pot bottom has formed another dark crust, 6 to 8 minutes. Repeat process of deglazing 2 or 3 more times, until onions are very dark brown. Stir in sherry and cook, stirring frequently, until sherry evaporates, about 5 minutes.


3. 3. Stir in broths, 2 cups water, thyme, bay leaf, and 1/2 teaspoon salt, scraping up any final bits of browned crust on bottom and sides of pot. Increase heat to high and bring to simmer. Reduce heat to low, cover, and simmer 30 minutes. Remove and discard herbs, then season with salt and pepper.


4. For the croutons: While soup simmers, arrange baguette slices in single layer on baking sheet and bake in 400-degree oven until bread is dry, crisp, and golden at edges, about 10 minutes. Set aside.


5.To serve: Adjust oven rack 6 inches from broiler element and heat broiler. Set individual broiler-safe crocks on baking sheet and fill each with about 1 3/4 cups soup. Top each bowl with 1 or 2 baguette slices (do not overlap slices) and sprinkle evenly with Gruyère. Broil until cheese is melted and bubbly around edges, 3 to 5 minutes. Let cool 5 minutes before serving.


This recipe is from Cook's Illustrated.
Published January 1, 2008.   From Cook's Illustrated.


Friday, September 17, 2010

First Attempt at Bread Making- French Bread 101

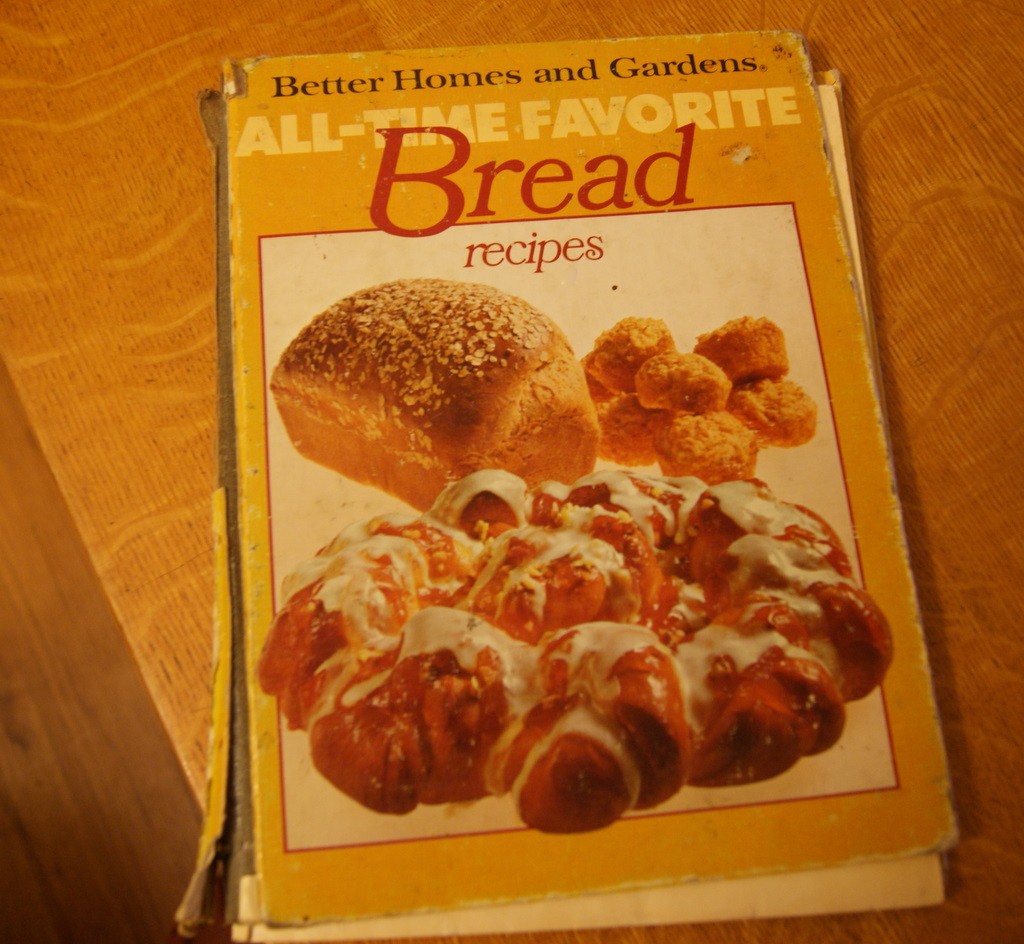
When I married my husband and starting moving all my stuff into his house (now our home) I found he had one cookbook! This surprised me...he actually had a cookbook! It is falling apart, held together at the binding by duct tape (it's a man's cookbook after all), and the pages are frayed. He used it for one recipe: biscuits. He makes the best biscuits! Whenever he makes them, he always quotes one of his favorite movies, Jeremiah Johnson, "I make damn good biscuits, boy!"
I haven't really read this cookbook until I was looking for a good yeast bread recipe recently. I wanted to teach myself to make French Bread and other yeast breads that are kneaded by hand. The first section in the book is "Loaves." It was just what I was looking for and had a picture tutorial.


Ingredients:
5 1/2 to 6 cups all-purpose Flour
2 packages active dry yeast
2 teaspoons salt
2 cups warm water (115-120 degrees)
1 slightly beaten egg
1 TBS water

Directions
In a large mixer bowl combine 2 cups of the flour, the yeast, and salt.
Add warm water. Beat at a low speed of electric mixer for 30 seconds, scraping sides of bowl constantly.
Beat 3 minutes at a high speed.

Stir in as much of the remaining flour as you can mix in with a spoon. Turn out onto lightly floured surface.

Knead in enough of the remaining flour to make a stiff dough that is smooth and elastic.
8-10 minutes of kneading total.

Shape into a ball. Place in a lightly greased bowl, turn it around in the bowl to grease all surfaces. Cover, let sit in a warm place until double. 1-1/4 hours.


Punch down, turn dough out onto lightly floured surface.


Divide in half.

Cover and let rest for 10 mins.

Roll each half into a 15x12 inc rectangle. (Or roll entire ball of dough into large rectangle for single loaf)


Roll up tightly from the long side. Taper the ends.

Place seam side down on well greased baking sheet (sprinkled with cornmeal if desired).
Cover and let rest 45 minutes.
Use a paring knife to slice 1/2 inch slices diagonally down the center of each loaf.

Brush with egg white mixture to obtain that golden crust.

Bake in 375 degree oven for 20-40 minutes.
(The time varies depending on the size of the loaves and your oven so keep an eye on it.)
About half way through the baking time, you can brush a second coat of the egg white mixture on the loaves.

Remove from oven. Cool. Enjoy!


So our first loaves did not turn out as pretty as we had hoped but they tasted delicious!

(Photography courtesy of Jessica.)

Thursday, September 16, 2010

Funky Junk Show Photos

Labor Day Weekend I went to the Funky Junk Show! It was at a cute little grange north of Sandpoint. They had all sorts of junk treasures and good deals. I got a vintage silk umbrella, a red vintage dress, and my dad bought me an apple box and a sign that says "Fresh Market." I also got to meet one of the founders of Funky Junk, Hollie! We connected through blogging and it was nice to meet in person. If you didn't make it to the show this year, you should mark your calendar for next year!


My dad buying a set of vintage milk bottles in a carrying with the original cardboard tops from Hollie.


Making connections with people and passing out our fliers...it was a good day!


 I met in person another fellow blogger and vintage decor lover, Kristen, from Sophia's.